Creating a Charles Log
Charles is a web proxy that runs on your computer and allows you to record data that is sent and received between your web browser and the server. Using Charles makes it easy to diagnose and fix problems. For details, see the Charles web proxy site.
Steps to create a Charles log
The following steps lead you through using the Charles web proxy to create a recorded log.
-
Download and install Charles on your machine. Charles is compatible with Windows, Mac and Linux. For platform specific details about installing Charles, see the Charles Installation notes.
- On your computer, run Charles. From the menu, select Proxy > Proxy Settings. Ensure a port has been assigned (e.g., 8888) and the Enable transparent HTTP proxying option is selected.
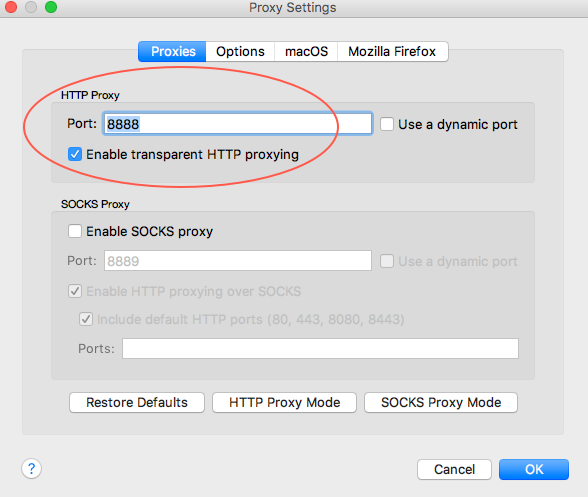
Proxy settings - Select OK to save changes and close the dialog.
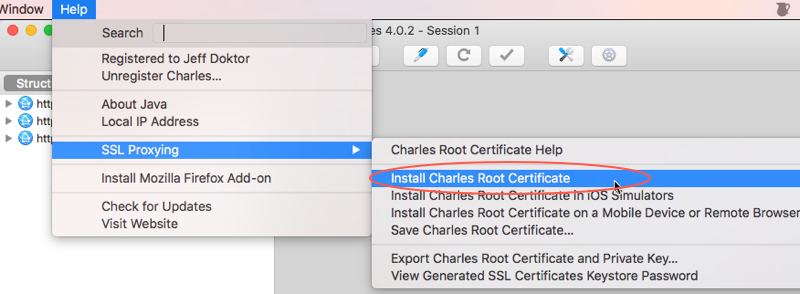
- Install the Charles SSL certificate. From the menu, select Help > SSL Proxying > Install Charles Root Certificate.
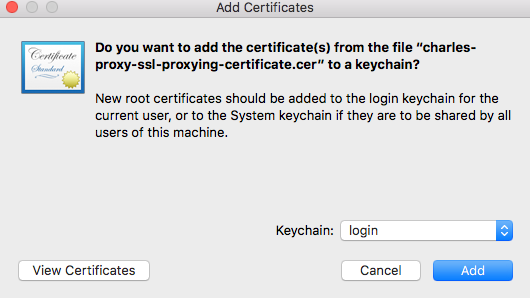
Install Charles SSL certificate - In the Add Certificate dialog, select Add.
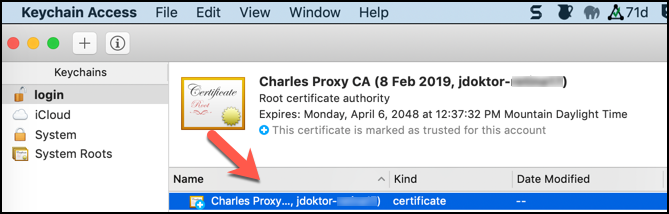
Add Charles SSL certificate - Keychain Access will open. From the certificate list, find the Charles Proxy... certificate. Double click on it to see detailed information.
Keychain Access - Expand the Trust section. For the When using this certificate option, select Always trust.
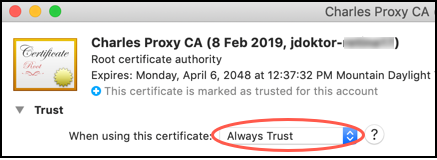
Trust certificate - Close the certificate window and enter your Admin password to update settings.
- Enable SSL proxying in Charles. From the menu, select Proxy > SSL Proxy Settings. Ensure the Enable SSL Proxying option is selected. In the Location section, select the Add button.

SSL Proxy settings - In the Edit Location dialog, navigate to the Port field and enter 443. Select OK to save this change.
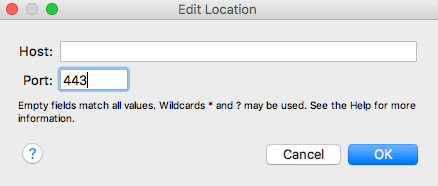
Location port 443 - Select OK to close the Edit Location dialog.
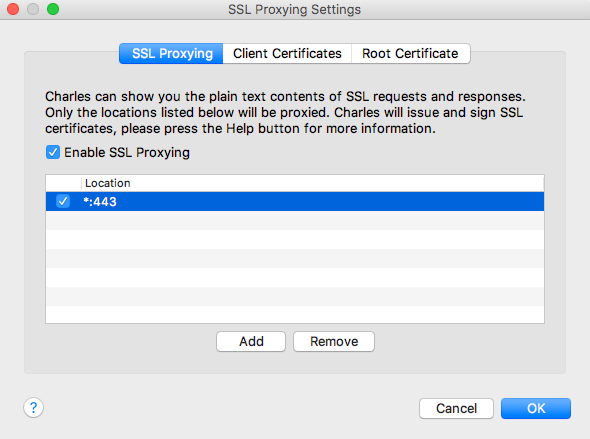
SSL settings with location - Select OK to exit the SSL Proxying Settings dialog.
- It's recommended that you restart your computer at this point to make sure that Charles picks up the new certificate settings.
- Keep Charles open while you do the next steps.
- Paste the URL to the page that contains the Brightcove Player you are troubleshooting into the browser's address bar, and then press Enter to load the page.
- Run through the steps you previously used to reproduce the error or issue. Charles will automatically record what is happening.
- If network traffic is needed for when the player is playing a video, start the video.
- After reproducing the error, return to Charles. Select the Structure view and find the URL for your player.
- Select Stop Recording.
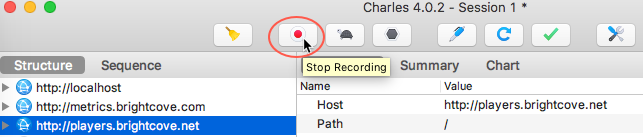
Charles stop recording - Save the current session in a file.
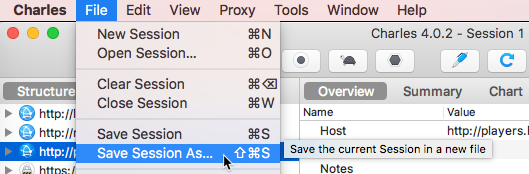
Charles save session - Email the Charles session file to the appropriate support personnel.
Add Akamai headers
In this section, you will learn how to add Akamai headers to your requests.
- From the main Charles window, select Tools and then Rewrite.
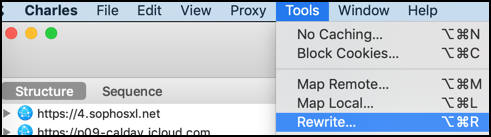
Tools Rewrite - In the Rewrite Settings dialog, select Enable Rewrite.
- Add a new Set called Akamai Headers.
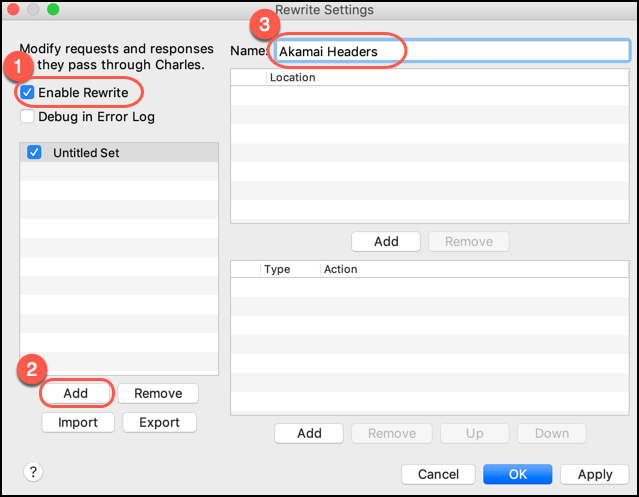
Add header - Add a new Rule.
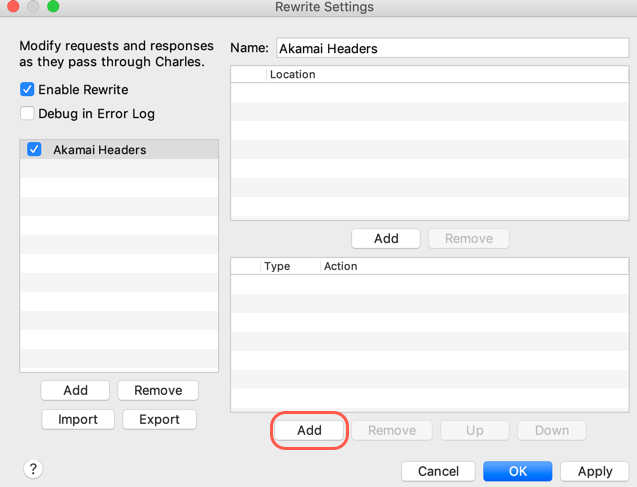
Add rule -
In the Rewrite Rule dialog, select a type of Add Header.
-
In the Replace section, add the following:
Name:
PragmaValue:
      akamai-x-get-request-id, akamai-x-cache-on, akamai-x-cache-remote-on,
      akamai-x-check-cacheable, akamai-x-get-cache-key, akamai-x-get-extracted-values,
      akamai-x-get-nonces, akamai-x-get-ssl-client-session-id, akamai-x-get-true-cache-key,
      akamai-x-serial-no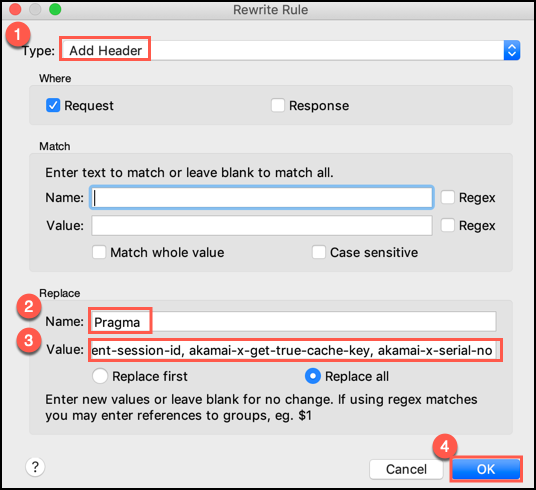
Add rule details - Select OK, and then OK.
Charles for mobile
To learn about capturing mobile logs with Charles, see the Debugging on Mobile Devices document.